

Choosing the right lighting can transform your home from ordinary to extraordinary, yet most homeowners feel overwhelmed by the sheer number of options available. Should you go with warm or cool tones? Do you need smart bulbs or traditional fixtures? How many lights does each room actually require? This guide breaks down the entire lighting selection process into a clear, actionable workflow. You’ll learn how to prepare your space, execute smart choices room by room, troubleshoot common mistakes, and verify your results for a home that looks and feels exactly how you want it.
Table of Contents
- Lighting Selection Workflow: What You Need Before You Start
- Step-By-Step Execution: Choosing The Right Lighting For Each Space
- Troubleshooting Common Lighting Selection Mistakes And How To Avoid Them
- Verifying Your Lighting Choice: Results To Expect And Final Adjustments
- Explore Lighting Solutions At New Way Ref
- What Is The Best Lighting Type For Living Rooms?
- How Can Smart Lighting Improve My Home’s Ambiance?
- What Common Mistakes Should I Avoid When Selecting Lighting?
- How Do I Measure To Ensure The Lighting Fits My Space?
Key takeaways
| Point | Details |
|---|---|
| Structured workflow simplifies decisions | Following a clear process reduces overwhelm and leads to better lighting outcomes for your home |
| Preparation is essential | Evaluating space requirements and lighting types before shopping saves time and money |
| Layer your lighting strategically | Combining ambient, task, and accent lighting creates depth and functionality in every room |
| Verification prevents costly mistakes | Testing and adjusting your choices ensures comfort, energy efficiency, and the ambiance you want |
Lighting selection workflow: what you need before you start
Before you browse a single fixture or bulb, you need a solid foundation. Jumping straight into shopping without understanding your space leads to mismatched styles, inadequate brightness, and wasted money. Start by walking through each room with a critical eye.
Evaluate room dimensions, ceiling height, and how natural light enters throughout the day. A north facing room receives cooler, indirect light and needs warmer artificial sources to balance it. Measure your ceiling height because fixtures hanging too low in an eight foot room create hazards, while high ceilings demand stronger light output to avoid dim corners. Note existing electrical outlets and ceiling boxes since relocating them adds significant installation costs.
Next, identify your lighting goals for each space. Are you creating a cozy reading nook, a bright workspace, or an elegant dining atmosphere? Proper pre-planning improves lighting outcomes significantly. Different activities demand different light levels and color temperatures.
Understand the three core lighting types:
- Ambient lighting provides overall illumination for a room, typically from ceiling fixtures, recessed lights, or chandeliers
- Task lighting focuses on specific work areas like kitchen counters, desks, or bathroom mirrors
- Accent lighting highlights architectural features, artwork, or creates visual interest through wall sconces or track lights
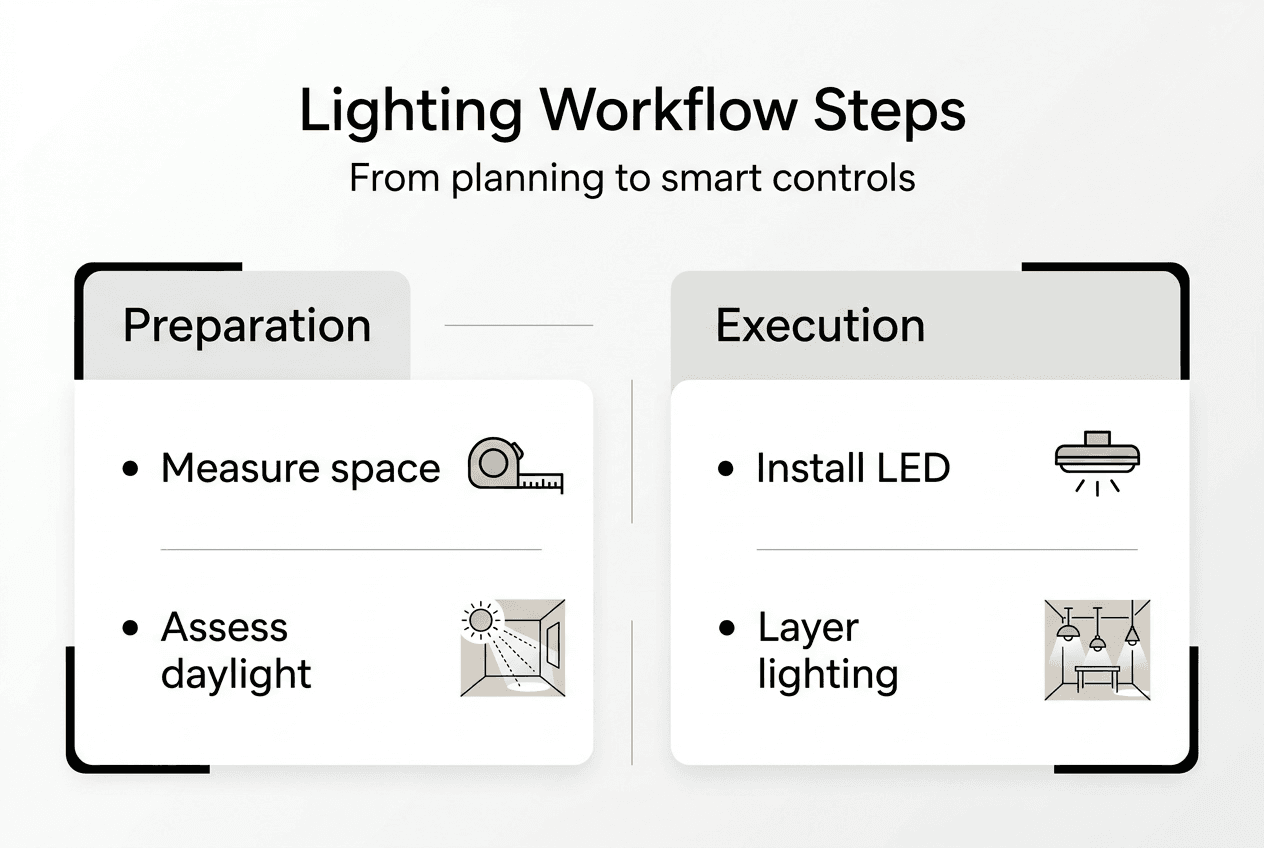
Most successful lighting designs layer all three types. A living room might combine a central ceiling fixture for ambient light, reading lamps for tasks, and picture lights for accents. Gather your tools before you shop: a tape measure, notepad for dimensions, and a folder for inspiration images. Photograph your rooms from multiple angles to reference while browsing.
Pro Tip: Measure the distance from your floor to any ceiling fixtures or fans currently installed. This helps you visualize how new pendant lights will hang and ensures you maintain adequate clearance for movement underneath.
Create a simple data table for each room:
| Room | Dimensions | Ceiling Height | Natural Light | Primary Use | Lighting Goal |
|---|---|---|---|---|---|
| Living Room | 15x18 ft | 9 ft | East windows | Relaxing, entertaining | Warm, layered |
| Kitchen | 12x14 ft | 8 ft | South windows | Cooking, eating | Bright, functional |
| Bedroom | 12x12 ft | 8 ft | West windows | Sleeping, reading | Soft, adjustable |
This preparation phase takes maybe an hour but saves countless hours of returns and reinstallations later. For smaller urban spaces, lighting tips for small spaces brighten urban homes with strategic placement and reflective surfaces.
Step-by-step execution: choosing the right lighting for each space
With your preparation complete, you’re ready to make informed selections. Follow this systematic approach for each room:
- Match lighting type to room function starting with ambient sources
- Calculate required brightness using the room square footage multiplied by 20 lumens for living spaces or 50 lumens for kitchens
- Select your preferred lighting technology considering longevity and energy use
- Choose color temperature based on desired mood and activities
- Pick fixture styles that complement your existing decor
- Determine control options including dimmers, switches, or smart systems
Lighting technology has evolved dramatically. LED bulbs now dominate the market because they last 25,000 hours compared to 1,000 for incandescent bulbs and use 75% less energy. Smart bulbs add another layer of functionality, letting you adjust brightness and color from your phone or voice commands. Smart lighting integration enhances functionality and personalization throughout your home.

Color temperature dramatically affects how a space feels. Measured in Kelvin, lower numbers produce warm, yellowish light while higher numbers create cool, bluish tones. Bedrooms and living rooms typically benefit from 2700K to 3000K for a cozy atmosphere. Kitchens and bathrooms work better with 3500K to 4100K for clarity and energy. Home offices often use 5000K to 6500K to mimic daylight and boost focus.
Compare your options:
| Feature | LED | Incandescent | Smart LED |
|---|---|---|---|
| Lifespan | 25,000 hrs | 1,000 hrs | 25,000 hrs |
| Energy Use | Very Low | High | Very Low |
| Color Options | Limited | Warm only | Full spectrum |
| Dimmable | Most models | Yes | Yes, plus scheduling |
| Initial Cost | Medium | Low | High |
| Long-term Value | Excellent | Poor | Excellent |
Layering is where lighting design becomes art. Start with ambient lighting as your base layer, ensuring no dark corners exist. Add task lighting wherever you perform detailed work like chopping vegetables, applying makeup, or reading. Finish with accent lighting to create visual interest and depth. A well designed living room might feature a central chandelier providing 60% of the light, two table lamps for reading adding 30%, and LED strips behind the TV contributing the final 10%.
Pro Tip: Install dimmers on every light switch possible. They extend bulb life, reduce energy costs, and let you adjust ambiance instantly for different activities or times of day.
Smart lighting systems integrate all three layers into controllable scenes. Morning mode might bring all lights to 100% brightness at 5000K. Evening mode could dim ambient lights to 40%, activate accent lighting, and shift everything to 2700K for relaxation. Modern home lighting explained through practical examples helps visualize these concepts in real spaces.
For 2026, look for fixtures with integrated smart technology rather than just smart bulbs. These systems offer better reliability and often include features like motion sensors, daylight harvesting that adjusts artificial light based on natural light levels, and circadian rhythm programming that mimics the sun’s color temperature changes throughout the day. The smart lighting guide modern homes covers the latest options available this year.
Troubleshooting common lighting selection mistakes and how to avoid them
Even with careful planning, certain pitfalls catch homeowners repeatedly. Recognizing these errors before installation saves frustration and expense.
Insufficient lighting ranks as the most frequent mistake. People underestimate how much light they need, especially in kitchens and bathrooms where tasks demand clarity. Calculate lumens properly using room square footage and don’t rely on guesswork. A 200 square foot kitchen needs approximately 10,000 lumens total, which might mean six recessed lights plus under cabinet strips, not just a single ceiling fixture.
Ignoring window placement creates problems too. Installing a television across from a west facing window guarantees glare during sunset hours. Position task lighting perpendicular to windows when possible, and use adjustable fixtures that let you redirect light as needed throughout the day.
Neglecting dimmers limits your flexibility. Fixed brightness works for closets and garages, but living spaces benefit enormously from adjustability. Dimmers cost only $15 to $30 more than standard switches but transform how you use a room. You can brighten for cleaning, dim for movie watching, and fine tune for any situation between.
“Poor lighting choices often result in discomfort and decreased functionality in home spaces, affecting everything from productivity to mood and even sleep quality.”
Other common errors include:
- Choosing fixtures based solely on appearance without considering light distribution patterns
- Installing recessed lights too far apart, creating pools of light with dark gaps between
- Using the same color temperature throughout the home instead of varying by room function
- Forgetting about bulb replacement accessibility, especially in high ceilings or tight spaces
- Overlooking the cumulative effect of multiple light sources in open floor plans
Test before you commit fully. Buy one bulb or fixture in your chosen style and live with it for a week. Notice how it performs at different times of day and during various activities. This small investment prevents buying twenty bulbs in the wrong color temperature or a chandelier that looked perfect in the showroom but overwhelms your actual dining room.
Pro Tip: Take photos of your lit rooms at night with your phone. The camera often reveals harsh shadows, glare spots, or color imbalances that your eyes adjust to but guests will notice immediately.
Fix existing problems systematically. If a room feels too dim, add task or accent layers rather than installing a brighter ambient fixture that might create glare. If lighting feels harsh, switch to lower color temperatures or add diffusers to existing fixtures. Repositioning a single lamp often solves shadow issues better than adding more lights.
Verifying your lighting choice: results to expect and final adjustments
Once your new lighting is installed, verification ensures you achieved your goals. This process takes a few days as you experience the lighting under different conditions.
Run through this evaluation checklist:
- Test brightness levels during typical activities in each room
- Check for dark corners or overly bright spots that need adjustment
- Verify color temperature creates the intended mood and supports room function
- Assess glare from any angle you typically occupy the space
- Confirm all controls work smoothly including dimmers and smart features
- Monitor energy usage if you have smart meters or monitoring systems
Brightness should feel comfortable, not straining. You shouldn’t squint or struggle to see details during tasks. Uniformity matters too. While some variation adds visual interest, dramatic differences between lit and shadowed areas create eye fatigue.
Adjust systematically based on what you discover. Bulbs are the easiest change, swapping color temperature or brightness takes minutes. Dimmer settings let you fine tune intensity without replacing anything. Repositioning portable lamps costs nothing but can dramatically improve light distribution. Only consider moving hardwired fixtures if these simpler adjustments fail to solve the issue.
Smart technology enables ongoing optimization. Verifying lighting outcomes ensures satisfaction and optimal home comfort. Program scenes for different times and activities, then refine them based on actual use. Your morning routine might need brighter light than you initially programmed, or your evening relaxation scene might benefit from warmer tones.
Energy efficiency verification matters for long term satisfaction. Compare your electricity bills before and after the lighting upgrade. LED conversions typically show 60% to 75% reductions in lighting energy use. Smart systems with scheduling and automation often add another 10% to 20% in savings by ensuring lights aren’t left on unnecessarily.
Common issues and adjustments:
| Issue | Likely Cause | Adjustment Method |
|---|---|---|
| Room feels dim | Insufficient lumens | Add task or accent layers |
| Harsh glare | Too bright or wrong placement | Install dimmers or diffusers |
| Colors look wrong | Incorrect temperature | Switch to 2700K-3000K warm or 4000K-5000K cool |
| Shadows on workspace | Poor task lighting | Add directional desk or under cabinet lights |
| High energy bills | Inefficient bulbs | Replace with LED equivalents |
Document your final configuration with photos and notes. Record bulb types, dimmer settings, and smart scene programming. This reference proves invaluable when bulbs need replacement or you want to replicate successful lighting in other rooms.
Give yourself two weeks with new lighting before making major changes. Your eyes and brain need time to adjust to different color temperatures and brightness levels. What feels too bright initially often becomes comfortable after a few days. The role of lighting in interiors extends beyond pure function to psychological comfort that develops over time.
Measure success against your original goals from the preparation phase. Did you achieve the cozy reading nook you wanted? Does the kitchen provide adequate task lighting for meal prep? Can you adjust the dining room from bright family dinners to intimate date nights? If the answer is yes, your workflow succeeded.
Explore lighting solutions at New Way Ref
Now that you understand the complete lighting selection workflow, finding quality fixtures and bulbs becomes the next step. New Way Ref offers a curated selection of lighting solutions designed for modern homes, from traditional fixtures to the latest smart lighting technology. The lighting collection features options for every room and style preference, whether you need ambient ceiling fixtures, focused task lamps, or accent lighting to highlight your favorite spaces.
Beyond lighting, the home decor collection provides complementary pieces that work with your new lighting design to create cohesive, beautiful rooms. Free shipping on orders over $50 makes it easy to outfit multiple rooms at once. Explore New Way Ref to discover how the right combination of lighting and decor transforms your house into the home you’ve always envisioned.
What is the best lighting type for living rooms?
Living rooms benefit most from layered lighting that combines all three types: ambient, task, and accent. Start with a central ceiling fixture or recessed lights for general illumination, then add table or floor lamps near seating areas for reading and detailed tasks. Finish with accent lights like wall sconces or LED strips to highlight artwork or architectural features. This approach creates flexibility for different activities from entertaining guests to quiet evenings at home.
How can smart lighting improve my home’s ambiance?
Smart lighting adds convenience and energy savings while tailoring light to your mood and activities. You can control brightness and color temperature remotely through apps or voice commands, creating custom scenes for different times of day. Schedule lights to turn on before you arrive home or gradually dim as bedtime approaches. Many systems track energy usage, helping you identify opportunities to reduce consumption. The ability to adjust lighting without touching a switch transforms how you interact with your space.
What common mistakes should I avoid when selecting lighting?
Avoid under lighting rooms by calculating required lumens based on square footage and function rather than guessing. Don’t ignore how natural light changes throughout the day, as this affects where you position fixtures and what color temperatures work best. Skipping dimmers is another frequent error that limits your ability to adjust ambiance for different activities. Always consider the room’s primary purpose when selecting brightness levels and color temperatures, as a one size fits all approach rarely works well.
How do I measure to ensure the lighting fits my space?
Measure your room’s length and width to calculate square footage, which determines how many lumens you need for adequate brightness. Record ceiling height because it affects both fixture selection and light distribution. Note the distance from the floor to any existing fixtures to help you visualize how new pendant lights or chandeliers will hang. Mark the locations of electrical outlets, switches, and ceiling boxes on your room sketch. For dining room chandeliers, measure your table dimensions and ensure the fixture is one half to two thirds the table width for proper proportion.